
Choosing an Anti-Ligature LED Downlight is not simply a matter of picking a bright, low-energy fitting. The right choice depends on the room, the people using it, and the risks identified through a competent site assessment. A fitting above a shower, for example, faces different moisture and cleaning demands from one in a corridor. Small details matter.
Look closely at the housing, lens, fixing method, and finish. Smooth, robust surfaces can make routine cleaning easier, while secure installation may help reduce opportunities for tampering. Check that the light output suits the space: harsh glare can be uncomfortable, yet dim corners may affect visibility. Consider colour temperature, beam spread, energy use, and the product’s stated ingress protection rating. These specifications need to match the actual environment, not just look impressive on a datasheet.
There is no universal “best” downlight. Some products may suit one room but prove difficult to maintain in another. Review manufacturer documentation, installation requirements, warranty terms, and relevant independent test information. Ask a qualified lighting or facilities professional to confirm suitability for the project and local requirements. Also consider how replacement or inspection will work after installation. A specification can seem complete on paper and still overlook daily cleaning or access needs. That is worth questioning. The following guide explains the practical criteria to compare, so decisions can balance safety, dependable lighting, maintenance, and the needs of the people who use the space.
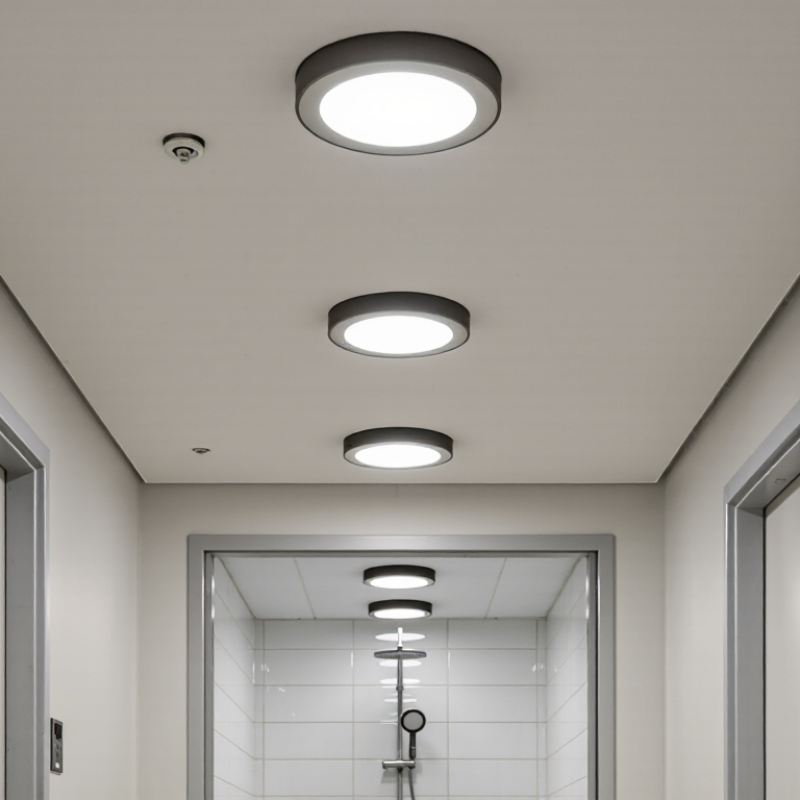
An anti-ligature LED downlight is designed to reduce points where a cord or fabric could be secured. Its lens and bezel usually sit close to the ceiling, with minimal gaps and no accessible hooks or protruding edges. Look closely at the complete fitting, not just its visible face. Small seams, screw heads, or a poorly finished ceiling opening can change how the fixture performs.
Fit matters. A securely fixed, flush-mounted unit is less likely to shift or expose a gap under routine use. Check how the housing is retained, whether fixings are accessible, and how wiring is protected. A sealed or impact-resistant construction may support durability, but those features alone do not make a light anti-ligature. Nor does a high ingress-protection rating. Details matter.
The right choice depends on the room, ceiling, cleaning routine, and level of supervision. Ask for product testing information and installation guidance, then have the fitting assessed in its actual setting. A specification sheet can look reassuring. It cannot show every on-site gap. I would also review maintenance access: a fitting that is difficult to inspect may be secure on day one, yet become harder to verify after repairs. No fixture removes every risk.
Understand what makes an LED downlight anti-ligature: it is the fitting’s shape, construction and installation—not the LED light source alone.
The chart is a qualitative selection guide, not a product test or regulatory rating. Prioritise a flush, low-projection design, secure tamper-resistant fixings and robust materials. Check the complete fitting and installation against the needs of the specific environment, applicable standards and a competent risk assessment.
Choosing anti-ligature LED downlights starts with understanding the room and the people who use it. Note ceiling height, room size, existing fittings, and places where shadows collect. A narrow washroom needs different light distribution from a shared bedroom or corridor. Observe how users move through the space at different times of day. Small details matter.
Consider visual needs, privacy, and daily routines. Some users may be sensitive to glare, while staff may need clear light for observation and care tasks. Ask facilities and clinical teams about cleaning schedules, maintenance access, and any known damage risks. Then compare the required brightness and colour appearance with the activities in each area. Check whether dimming or separate lighting zones would help, and confirm compatibility with the existing electrical system. A warm, even light may feel calmer, but it can make some tasks harder. A site walkthrough is useful; still, one visit may miss changing needs, so review feedback after installation.
| Assessment area | What to assess | Illustrative requirement or consideration | Selection guidance |
|---|---|---|---|
| Room type and activity | Identify the main task, room layout, ceiling height, and areas where people need to see clearly. | A corridor, bedroom, washroom, and examination space have different lighting needs. Maintained illuminance targets should be set for the actual task and applicable local guidance. | Start with a lighting plan and calculations rather than choosing a downlight by wattage alone. |
| User needs and risk assessment | Consider the people using the space, supervision needs, accessibility, and the site’s assessed ligature risks. | Risk can depend on the fixture shape, fixings, position, surrounding surfaces, and how the room is used. | Have the responsible facilities and clinical or safety teams review the complete installation. No fixture alone guarantees a ligature-free environment. |
| Fixture construction | Check the bezel, lens or diffuser, fasteners, housing, and how the unit sits in or on the ceiling. | A suitably specified anti-ligature design typically aims to minimise accessible edges, gaps, and attachment points when installed as intended. | Request product drawings, installation details, and evidence relevant to the project’s safety specification; verify compatibility with the ceiling construction. |
| Light level and uniformity | Check maintained illuminance on the relevant working plane, light distribution, and shadowing. | As broad examples, general corridors are often designed around 100 lux and general work areas around 300–500 lux; the appropriate value depends on the task and governing standards. | Confirm project-specific targets with a qualified lighting designer and check calculations against the applicable lighting standard. |
| Glare and visual comfort | Consider viewing angles, reflective surfaces, contrast, and whether occupants may be lying down or seated. | Direct view of a bright LED source can cause discomfort, particularly in bedrooms and observation areas. | Compare optical data and choose a distribution and diffuser appropriate to the room; assess glare from typical user positions. |
| Colour quality and appearance | Specify colour temperature and colour rendering to suit the setting and visual tasks. | Neutral white light is commonly used in many care and institutional spaces; accurate colour rendering can matter for inspection and care tasks. | Check correlated colour temperature and colour-rendering data, and keep the appearance consistent across adjacent spaces. |
| Controls and operating hours | Review switching, dimming, occupancy sensing, night lighting, and any required staff controls. | Controls should support safe use and avoid unwanted darkness or abrupt changes where continuous visibility is important. | Confirm that drivers and controls are compatible, and test the complete control sequence before handover. |
| Environment and electrical requirements | Check moisture exposure, cleaning methods, ceiling type, supply, and any emergency-lighting requirements. | Washrooms may require an appropriate ingress-protection rating for the installation location. Emergency lighting is a separate design requirement where applicable. | Verify ratings, wiring, installation clearances, and compliance with local electrical and building regulations. |
| Maintenance and lifecycle | Assess cleaning access, replacement procedures, expected operating hours, and the consequences of downtime. | LED output declines over time, and dirt or ageing can reduce the light reaching the task area. | Review lumen-maintenance data, warranty terms, cleaning instructions, and a safe maintenance plan that preserves the intended fixture installation. |
Note: Illuminance examples are indicative only. Confirm final targets, product suitability, and installation details against the project risk assessment and applicable local standards.
Compare Materials, Mounting Methods, and Safety Features
Material choice affects both durability and cleaning. Stainless steel can resist impacts and frequent wiping, while coated metal may suit lighter-duty rooms. Check seams, edges, and the lens, not just the housing. A smooth surface is easier to inspect. Small details matter. A polished finish can look reassuring, but appearance alone proves little; ask for product specifications and relevant test information.
Mounting method matters just as much. A recessed fitting may sit close to the ceiling, but only when the ceiling structure and installation allow a secure, flush fit. Surface-mounted designs can work where access above the ceiling is limited. Inspect how the fitting is fixed, and whether exposed gaps or removable parts could create snag points. Installation quality matters.
Review safety features as a complete system. Look for a robust lens, secure fasteners, and a design that limits accessible edges. Confirm the light output, colour temperature, and maintenance needs suit the room’s use. A cool, dim fitting may frustrate staff and occupants. Not every specification is obvious. Have a competent lighting or facilities professional assess the site, because the safest choice depends on the ceiling, users, and cleaning routine.
Choosing anti-ligature LED downlights starts with the room’s lighting task. Check measured illuminance, beam angle, glare control, and colour rendering against the facility’s needs. A corridor may need even light across the floor, while a clinical room needs clear visibility at work surfaces. Ask for photometric data, not just a lumen figure. High output alone does not guarantee useful light.
Tips: Review the product’s test documents and installation details. Confirm that the fitting, fixings, and ceiling interface suit the room’s assessed risks. Requirements vary by location, so verify applicable standards with a qualified project professional. Look closely for exposed edges, gaps, or parts that could loosen.
Maintenance matters too. Check how staff can inspect, clean, and replace the fitting without damaging its secure mounting. A smooth, sealed face may simplify cleaning, but confirm the cleaning method is compatible with its materials. Ask about expected service life, driver access, and replacement procedures. One easy detail to overlook is future access above the ceiling. A specification can look reassuring, yet still miss how the fitting will be maintained in the actual room.
How to Choose Anti Ligature LED Downlights?
Select and Specify the Right Downlight for the Project
Start with the room’s assessed risks, ceiling construction, and maintenance plan. An anti-ligature downlight should sit securely and avoid accessible gaps or projections. Check how its bezel, fixings, and housing meet the project’s requirements; do not assume that a product’s label alone confirms suitability. Fit matters. Specify the required light level, colour temperature, colour rendering, and dimming method for the space. Confirm compatibility with the control system and any emergency-lighting design. For showers or wash areas, verify the required ingress protection rating.
Tips: Ask for installation details, cleaning guidance, and maintenance access before approval. Review the fitting against the actual ceiling build-up, not just a catalogue image. A sample or mock-up can reveal glare, shadows, and awkward edges. Test it.
Record the selected model’s dimensions, cut-out size, finish, electrical requirements, and relevant performance documentation in the specification. Coordinate these details with the ceiling contractor and electrical designer, especially where access above the ceiling is limited. Cleaning chemicals and repeated maintenance can affect finishes over time, so confirm suitable care methods with the supplier. One detail is easy to miss: the best-looking option may not be the easiest to service. Recheck the selection against the project’s risk assessment before ordering.
