
Choosing 2" fauxwood cordless blinds involves more than matching a white finish to your walls. The right option should balance light control, privacy, durability, and safe daily operation. Begin by measuring the window opening carefully. Record the width at the top, middle, and bottom. Small differences can affect the fit. Then consider how the room works. A sunny bedroom may need stronger light filtering, while a kitchen may require easy cleaning. Dust can collect along the slats, especially near cooking areas.
Ralph Vasami, a longtime window-covering safety advocate, says, “Cordless window coverings provide a cleaner appearance while helping reduce accessible cords around children and pets.” His point matters when comparing 2" fauxwood cordless blinds for family spaces. Look for a sturdy headrail, smooth tilt control, and durable slats that resist bending. A 2-inch slat usually offers a familiar wood-blind appearance and clear outside views when open. However, wider slats may show more dust and allow stronger sunlight into the room. That trade-off deserves attention.
Material quality matters too. Faux wood should feel firm, not hollow or brittle. Test the cordless lift before buying, if possible. It should move evenly without sudden drops. Also check the manufacturer’s cleaning guidance and warranty terms. Online photos can mislead. Colors often look warmer beside real flooring. A perfect choice? Not always. Careful measurements, realistic expectations, and verified product details create a more reliable decision.
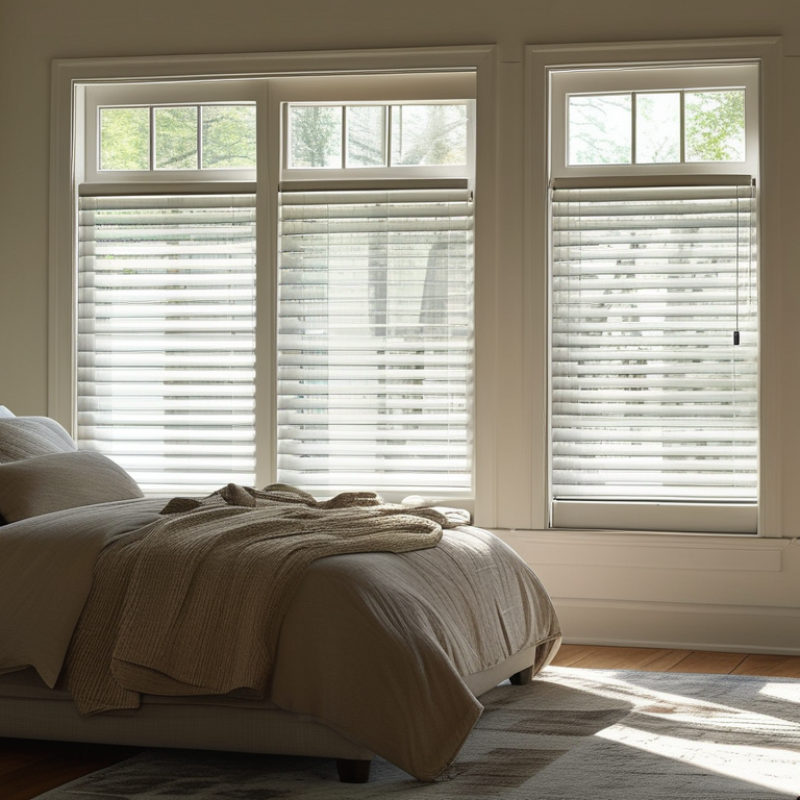
How to Choose 2 Inch Faux Wood Cordless Blinds?
Two-inch slats create a practical balance between daylight, privacy, and outdoor views. Their wider profile lets you tilt the slats gradually, instead of opening the entire blind. Morning light can enter softly. Closed slats create a calmer, more private room. The view remains available through small adjustments.
The U.S. Department of Energy reports that windows can account for 25–30% of residential heating and cooling energy use. Blinds cannot replace efficient glazing, but they can help manage sunlight and indoor comfort. In my experience, closing the slats during strong afternoon sun reduces glare on screens and furniture. White or light-colored slats often reflect more sunlight, while darker finishes may create a warmer visual effect. That choice is personal, and I sometimes underestimate how much color changes a room.
Tips: Check the window depth before ordering. A two-inch slat needs enough clearance to tilt smoothly. Choose cordless operation for a cleaner appearance and easier access near desks or beds. Test the slat angle from your usual seating position. A perfect view at standing height may disappear when you sit. Also, do not judge privacy only at noon; streetlights and interior lighting can change visibility after dark.
For 2-inch faux wood cordless blinds, material choice matters more than color in humid, sunny rooms. PVC slats resist direct water and do not absorb moisture like natural wood. They suit bathrooms, kitchens, and coastal homes. However, PVC can soften or expand near strong heat sources. Keep blinds away from radiators and hot glass.
Composite slats usually combine polymers with wood fibers or mineral fillers. They often feel more rigid and maintain a straighter profile in bright windows. Yet their moisture resistance depends on edge sealing and the exposed core. A damaged edge may absorb water slowly. The U.S. Department of Energy reports that fully closed reflective blinds can reduce summer solar heat gain by up to 45%. The result depends on window orientation, glass type, and installation quality. It is not a guarantee. NFRC guidance also separates solar heat gain from insulation performance, so a “heat-resistant” label needs careful checking.
Tips: Place PVC in wet rooms. Choose sealed composite for living rooms with intense sunlight. Check the product’s temperature range, slat warranty, and moisture testing method. Hold a sample near the window for one afternoon. Look for bowing, odor, or edge movement. I once underestimated afternoon heat on west-facing glass; the blinds looked stable in the morning but shifted later. A small gap behind the headrail can also reduce trapped heat.
Choosing 2-inch faux wood cordless blinds involves more than matching slat color and window size. The lift rail should move smoothly without a hanging cord, loop, or exposed inner cord. Check the tilt control carefully. A wand may be acceptable, but it should not create a loop or detach during normal use. Small details matter near a child’s bed or a pet’s resting area.
Look for product information that references ANSI/WCMA A100.1-2022. This standard addresses window-covering safety and helps manufacturers design safer operating systems. Ask the seller for a compliance statement or test documentation for the exact model, not a similar-looking product. A warning label alone is not proof. Under applicable CPSC rules, certain window coverings must reduce strangulation hazards from operating and accessible inner cords. Requirements can depend on product type, manufacture date, and installation conditions. Check current CPSC guidance before buying.
At home, lower the blind fully and inspect the bottom rail, headrail, and tilt wand. Nothing should form a reachable loop. Test the blind several times with one hand, then check whether any part loosens. I once treated “cordless” as a complete safety answer; that was too simple. A damaged mechanism can create a new hazard. Keep furniture away from the window, install hardware firmly, and retain the instructions. If the documentation is vague, the fit feels unstable, or the seller avoids safety questions, choose another product. Safety information should be easy to verify, not hidden behind cheerful product photography.
How to Choose 2 Inch Faux Wood Cordless Blinds?
Inside-mount clearance decides whether 2-inch faux wood cordless blinds operate smoothly. Measure the window opening at the top, middle, and bottom. Record the narrowest width, then measure the opening height on the left, center, and right. Use the shortest height. Measure twice.
Check the product’s required minimum depth before ordering. A two-inch slat does not always require exactly two inches of recess space. Headrail shape, mounting brackets, tilt components, and window handles can change the clearance. The ANSI/WCMA A100.1-2022 standard addresses window-covering safety, but it does not replace the product’s installation instructions. Leave enough room for the slats to rotate without touching the glass, frame, or latch. Do not guess.
Professional fitters often inspect obstructions before finalizing measurements. Note locks, weather seals, screens, crank handles, and uneven trim. A small obstruction can force an outside mount instead. According to the U.S. Consumer Product Safety Commission, more than 200 children died from window-covering cord strangulation incidents between 1990 and 2015. Choosing a cordless design removes operating cords, but correct installation still matters. CPSC guidance also emphasizes keeping window coverings securely installed and away from children’s sleeping areas. I have found that rushed measurements create the most expensive mistakes. A narrow opening may need a small deduction, depending on the supplier’s instructions. Follow those instructions exactly.
| Measurement or Selection Factor | How to Measure or Evaluate | Typical Guideline | Why It Matters |
|---|---|---|---|
| Inside-Mount Window Measurement | |||
| Window opening width | Measure the clear inside width at the top, middle, and bottom of the window opening. Record each measurement to the nearest 1/8 inch. | Use the smallest width | Window openings are often slightly uneven. Using the narrowest measurement helps prevent the blind from binding. |
| Window opening height | Measure the clear inside height on the left, center, and right sides. Record each measurement to the nearest 1/8 inch. | Use the longest height | The longest measurement helps ensure that the blind reaches the sill without leaving an unintended gap at the bottom. |
| Opening squareness | Compare the three width measurements and the three height measurements. Also compare the two diagonal measurements if the opening appears noticeably irregular. | Small differences are normal | A large difference may indicate an out-of-square opening, which can affect slat alignment, operation, and light gaps. |
| Width deduction for an inside mount | Provide the measured opening width to the window-treatment supplier unless the product instructions specify a customer deduction. | Do not deduct automatically | Many ready-made or custom blinds use a manufacturer deduction for operating clearance. An additional deduction can make the blind too narrow. |
| Height deduction for an inside mount | Use the measured opening height unless the product instructions state otherwise. | Usually no customer deduction | Height deductions vary by headrail and bottom-rail design. Following the product specification prevents excess space below the blind. |
| Clearance and Installation Requirements | |||
| Minimum mounting depth | Measure from the front edge of the window frame to the glass, handle, screen, or any obstruction. | Approximately 1 1/2 inches | A typical 2 inch faux wood blind may need about 1 1/2 inches of depth for the headrail and operating components. Always confirm the selected hardware specification. |
| Preferred flush-mount depth | Measure the full depth available inside the window recess, including space behind the front edge of the frame. | Approximately 2 1/4 inches or more | Additional depth allows the headrail and slats to sit farther inside the recess and may reduce contact with trim, handles, or glass. |
| Obstruction clearance | Check for window handles, locks, insect screens, mullions, crank mechanisms, and weather stripping before ordering. | Keep moving parts clear | Obstructions can prevent the slats from tilting fully or cause the blind to project beyond the frame. |
| Window opening type | Confirm that the opening has a continuous, reasonably flat mounting surface for the brackets. | Flat upper surface recommended | Inside-mount brackets require stable material such as wood, composite framing, or a suitable solid header. |
| Choosing the Blind Configuration | |||
| Slat width | Select a 2 inch horizontal faux wood slat for the requested style and proportion. | 2 inches | Two-inch slats provide a traditional appearance, moderate view-through when tilted open, and relatively simple dusting. |
| Material | Choose moisture-resistant faux wood rather than natural wood where humidity or occasional splashing is expected. | Composite or PVC-based construction | Faux wood is generally more resistant to warping in kitchens, bathrooms, and other humid areas than untreated natural wood. |
| Cordless operating system | Confirm that the blind raises and lowers using the bottom rail and that the product includes the required child-safety hardware. | Cordless lift preferred | Cordless operation reduces dangling cords and creates a cleaner appearance, but the blind must still be installed and operated according to safety instructions. |
| Inside-mount light gap | Expect a narrow gap at each side and around the headrail because the blind must fit within the opening and operate freely. | Some light leakage is normal | An inside mount emphasizes the window frame but cannot provide a fully blackout seal without additional side or frame treatments. |
| Window depth below the headrail | Check that the first slat and tilt mechanism will not interfere with the glass, screen, or handle when the blind is fully tilted. | Clear the deepest obstruction | Even when the headrail fits, a protruding handle or deep screen frame can restrict slat rotation. |
| Example Measurement Record | |||
| Width readings | Top: 35 7/8 inches; middle: 35 13/16 inches; bottom: 35 3/4 inches | Order width basis: 35 3/4 inches | The smallest width is used for the ordering measurement. Apply only the deduction specified by the product instructions. |
| Height readings | Left: 60 1/8 inches; center: 60 inches; right: 60 1/4 inches | Order height basis: 60 1/4 inches | The longest height is used to help the blind cover the complete opening. |
| Depth reading | Available recess depth: 2 1/2 inches; handle projection: 1/2 inch | Generally suitable for inside mount | The recess exceeds the typical minimum depth, but the handle position should still be checked against the slat tilt path. |
| Important: Clearance requirements vary by headrail design, bracket style, and manufacturer. Use these measurements as planning guidelines and compare them with the exact installation specification before placing an order. | |||
| Recommended measuring tools: steel tape measure, pencil, notepad, and step stool when necessary. Measure every window separately, even when the windows appear identical. | |||
How to Choose 2 Inch Faux Wood Cordless Blinds?
A strong warranty can reveal how confidently a manufacturer supports its product. Read the coverage period, exclusions, and repair process before purchasing. Some warranties cover only hardware, while others include slats, cords, and operating mechanisms. Keep your receipt and installation records. You may need both.
Durability ratings deserve careful attention. Look for moisture resistance, UV protection, smooth cordless operation, and tested lift cycles. These details matter in kitchens, bathrooms, and sunny rooms. A heavier slat may feel sturdier, but it can require stronger mounting hardware. I once chose blinds based only on appearance. That decision was not practical. The slats warped near a humid window. Manufacturer installation standards can prevent similar problems. Check the required bracket spacing, screw type, window depth, and maximum blind size. Incorrect mounting may void the warranty and create safety concerns.
Tips: Measure the window in three places, then record the smallest width. Confirm the blind’s weight before selecting fasteners. Follow the included instructions exactly, even if installation seems simple. Test the cordless mechanism several times after mounting. It should lift evenly and stop smoothly. If the instructions feel unclear, pause and contact qualified support. A small measurement mistake can become an expensive replacement. Also, inspect the blinds after delivery. Look for chipped corners, bent slats, or uneven headrails. Photograph problems immediately. Reliability often depends on details that are easy to overlook.
